Get familiar with notarytool (Xcode13)
Table of Contents
Xcode and the tools #
In this post we will take a practical look at the new notarytool that helps to notarize macOS software before distribution.
Apple is in the process of updating Xcode to version 13, just before the upcoming fall release of macOS 12 (Monterey). With Xcode 13 presented at WWDC 2021, they introduced the notarytool which aims to improve the notarization workflow.
In automated and manual processes, the Xcode command line xcrun altool was previously the main way to perform notarization outside the Xcode GUI. In the Xcode 13 release the GUI workflow has not changed, you submit a build result to the Apple Notary Service using the Product > Archive > Distribute App procedure, but now in this process the atool has been replaced by the notarytool.
What improvement can be gained from the notarytool? #
The overall impression is that the new tool and related processes are generally faster. Apple seems to have worked mostly on the backend, and the notarytool is now also a native Cli tool (the previous altool was java-based)
Well, we already know that notarization is best accomplished using the latest Xcode command line tools, so now it is time to get familiar with the notarytool that is part of the new Xcode 13, especially when customizing the Notarization Workflow.
man page:
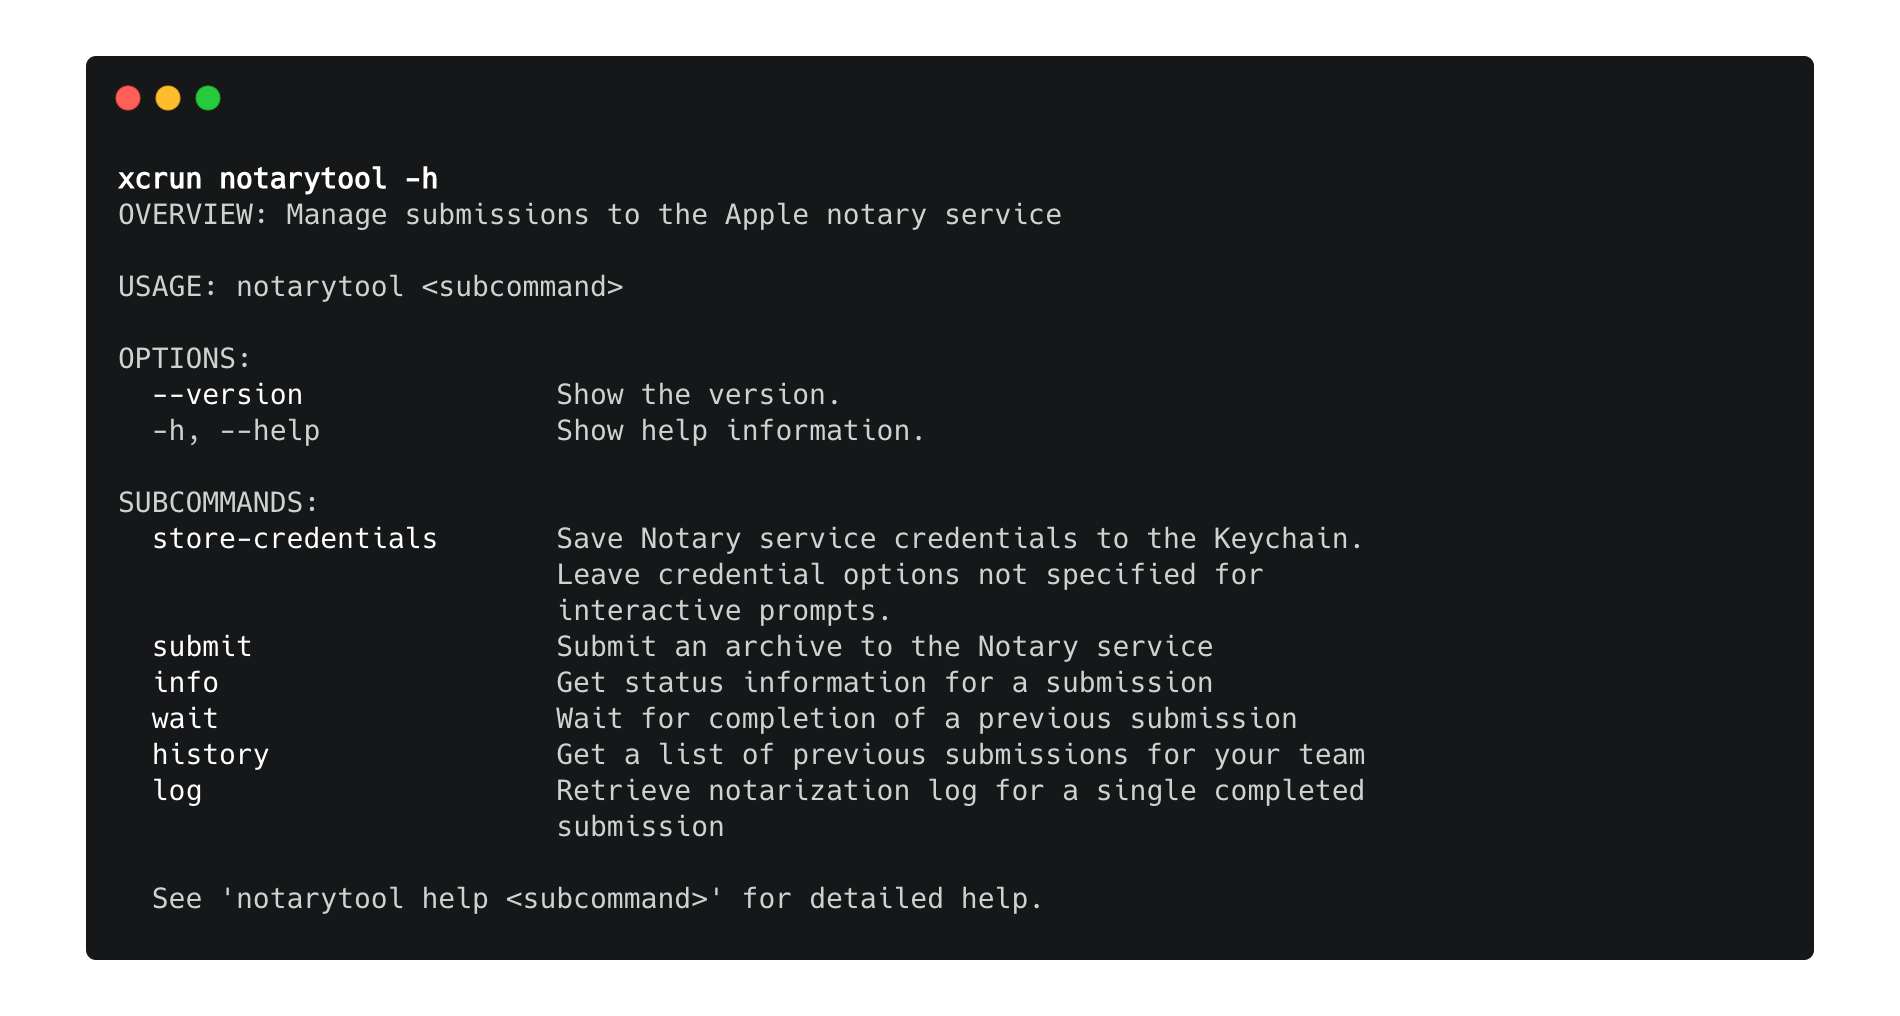
The following is a quick run-through of using the new notarytool workflow, which summarizes the detailed Apple Developer document, here in somewhat abbreviated form.
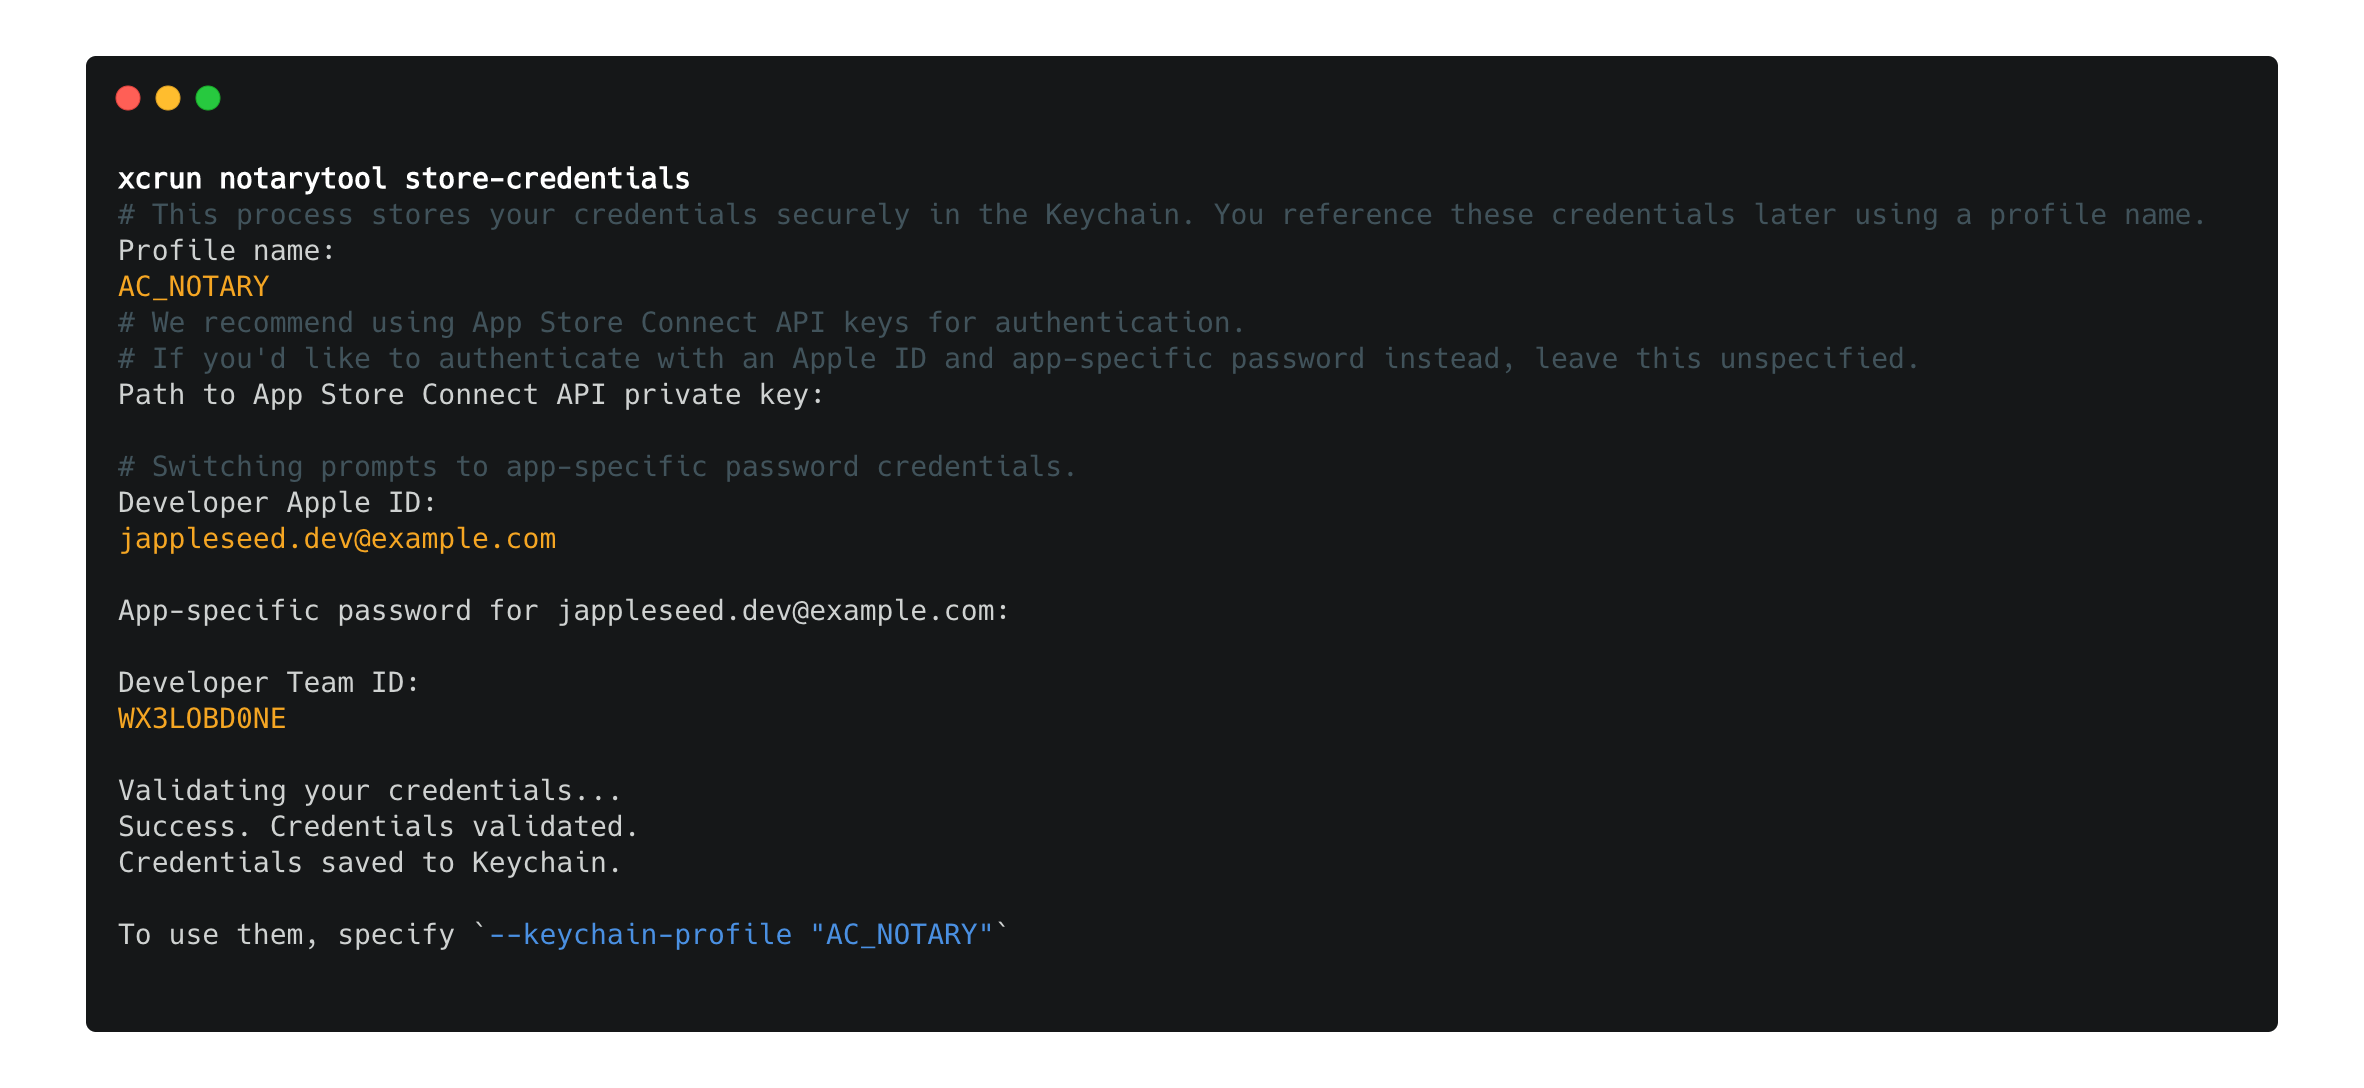
Store credentials to Keychain #
This is an interactive command and process that securely stores your credentials in the Keychain.
command:
xcrun notarytool store-credentials
You reference these credentials later using them with a custom profile name. For a local workflow, it is sufficient to select the option to authenticate with an Apple ID and an app-specific password.
For an AppleID, you can set up an app-specific password to log in to an app or service that is not provided by Apple; read more about this here.
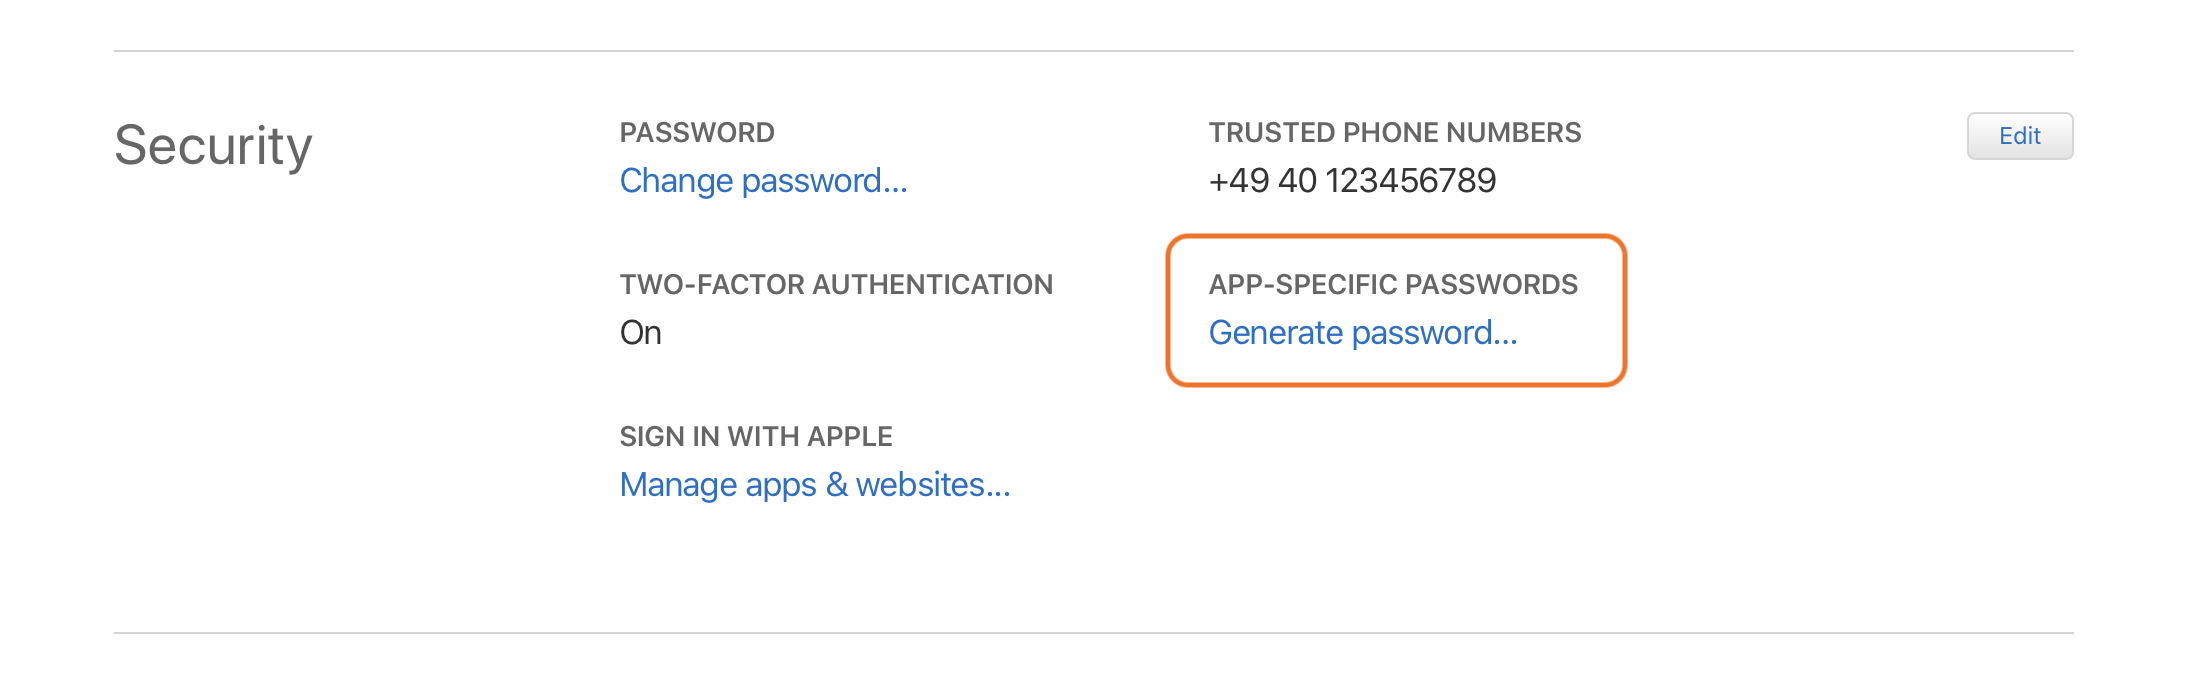
- Log in to https://appleid.apple.com using your AppleID (associated with a developer or team account).
- In the Security > App-specific passwords section, click “Generate password…”
- Enter a password label
- Make a note of the displayed password (displayed only once)
- Open the Terminal.app
- Start the interactive
xcrun notarytool store-credentialsprocess - note we’ll use"AC_NOTARY"as ProfileName in following examples - Where it is requested enter your Apple ID, app specific password and Developer Team ID.
example run:
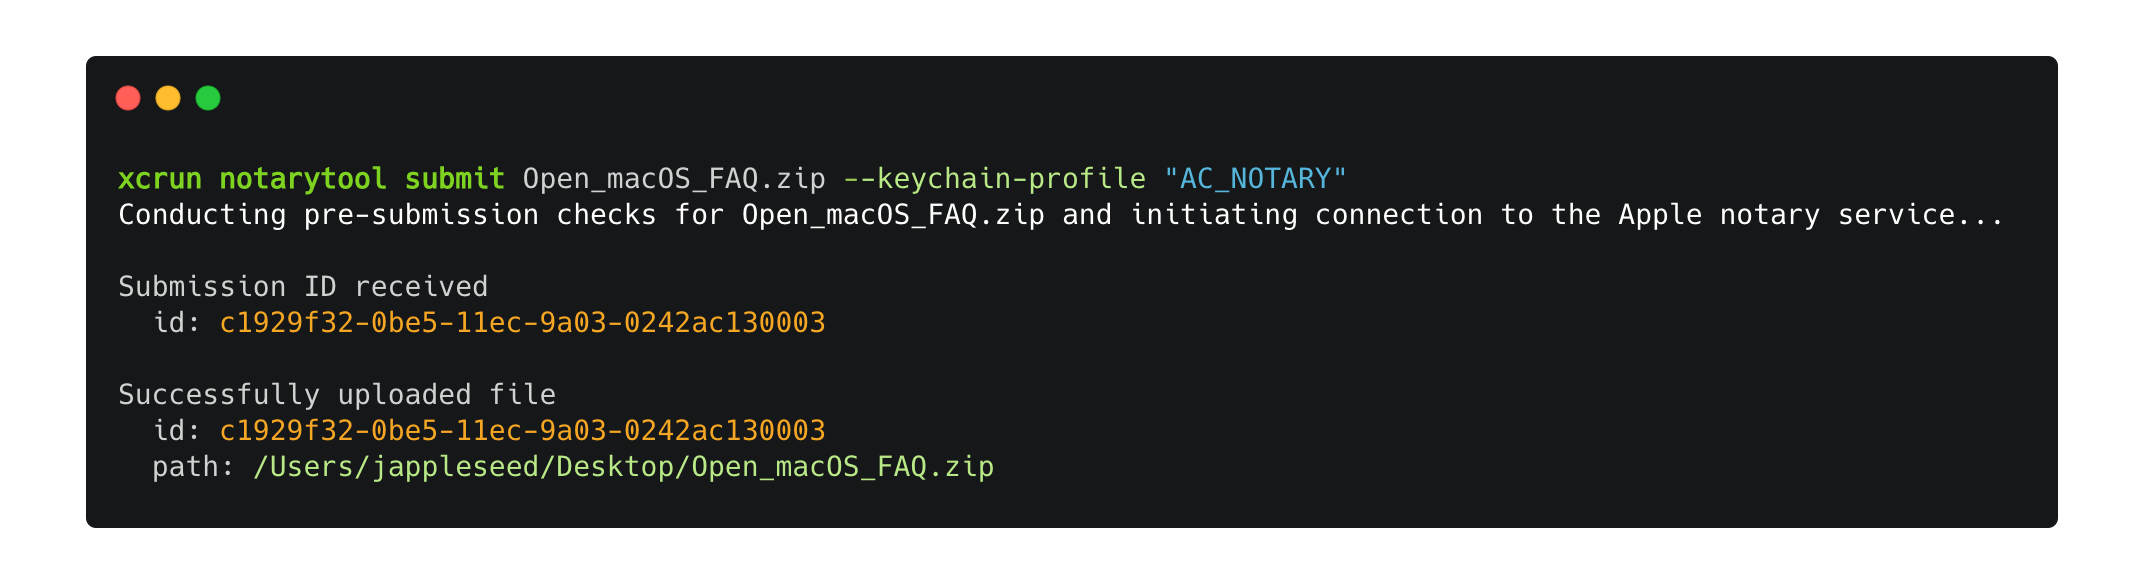
Submit application #
command:
xcrun notarytool submit myapp.zip --keychain-profile "AC_NOTARY"
example run:
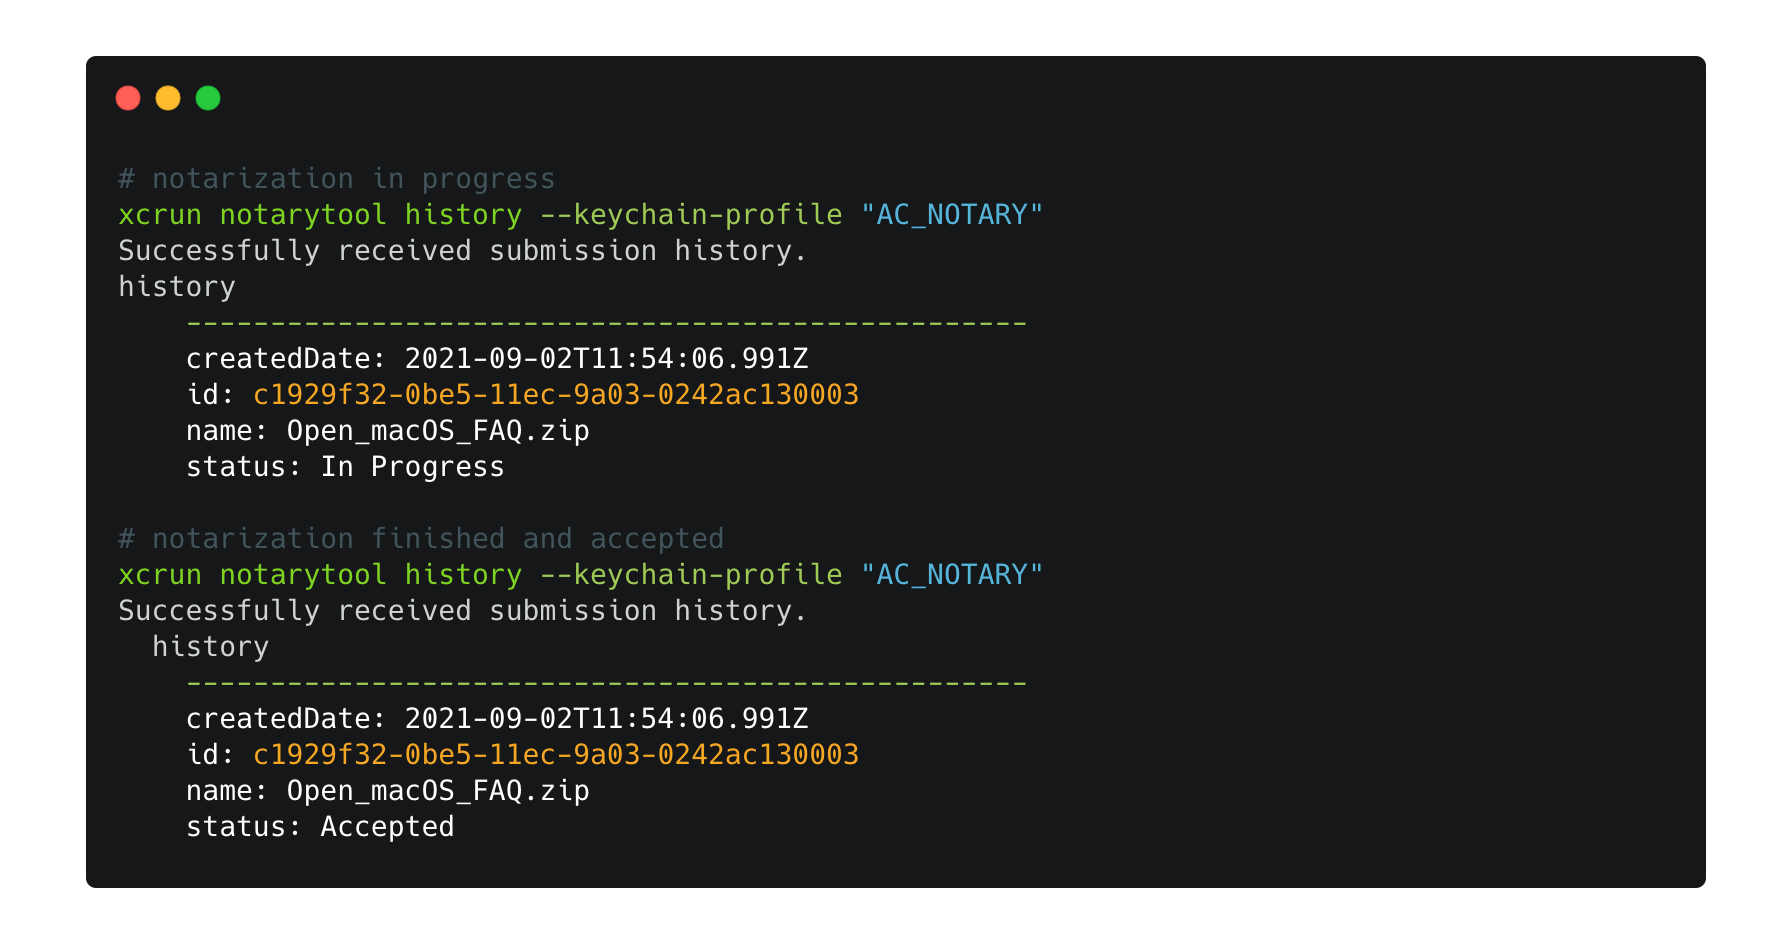
Check Status #
command:
xcrun notarytool history --keychain-profile "AC_NOTARY"
example run:
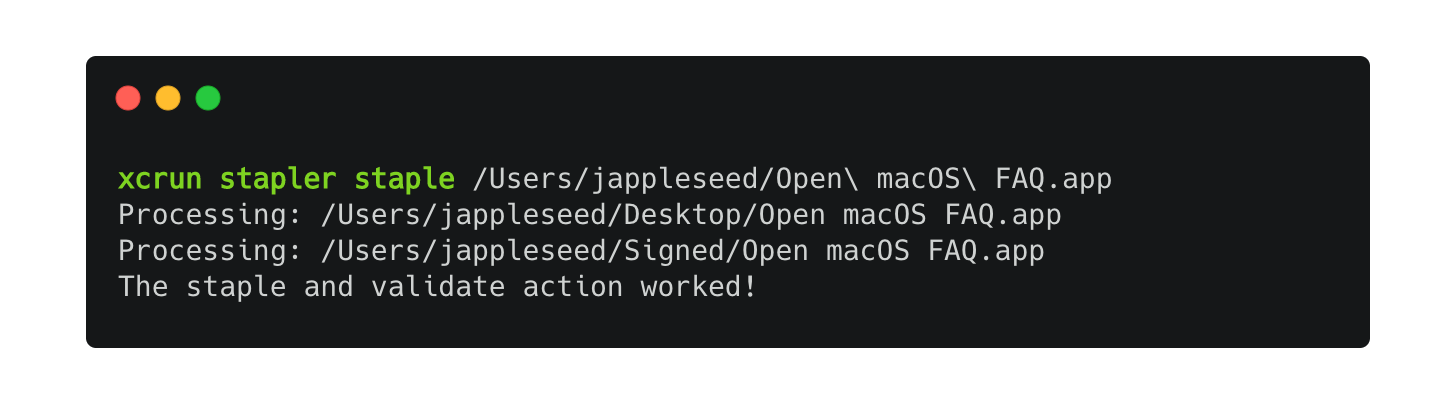
Stapling #
You should attach the ticket to your software using the stapler tool, this ensures that Gatekeeper can find the ticket even when a network connection isn’t available.
command:
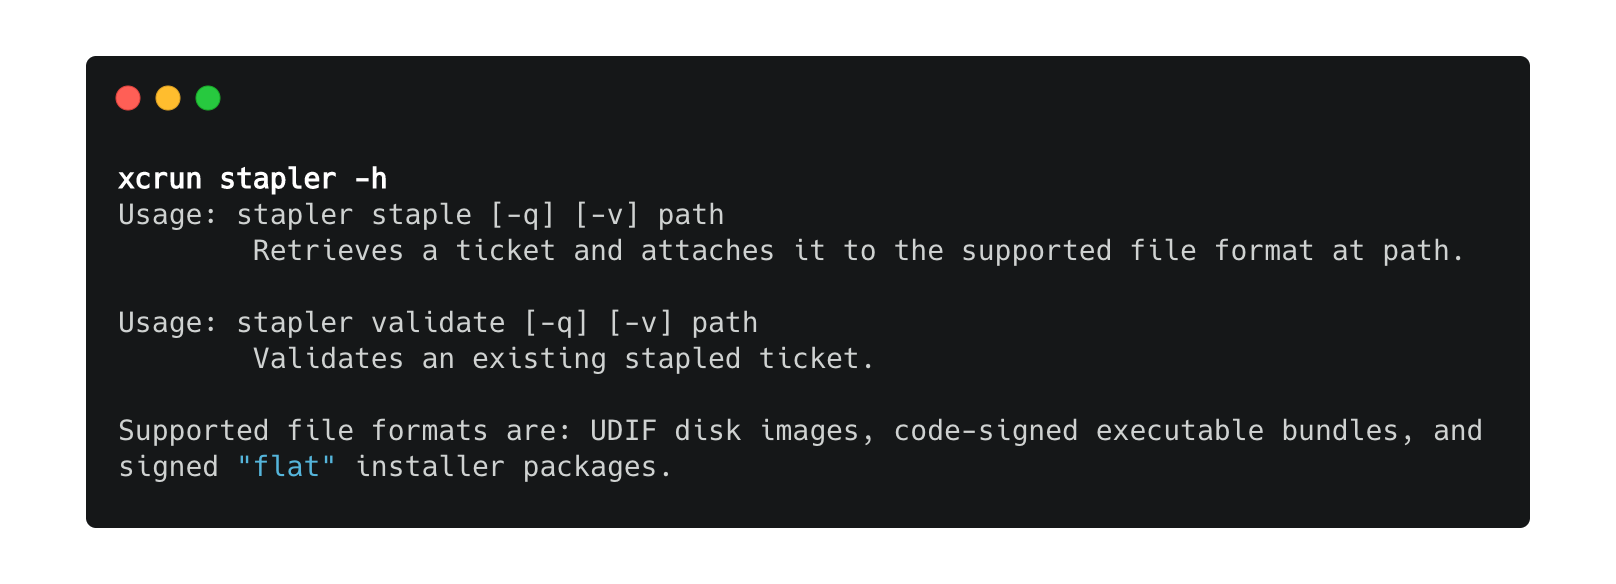
xcrun stapler staple myapp.app
Retrieves a ticket and attaches it to the supported file format at path. Supported file formats are:
- code-signed executable bundles
- signed “flat” installer packages
- UDIF disk images
example run:
man help page:
Validate notarization #
command:
xcrun stapler validate myapp.app
spctl -a -vv myapp.app
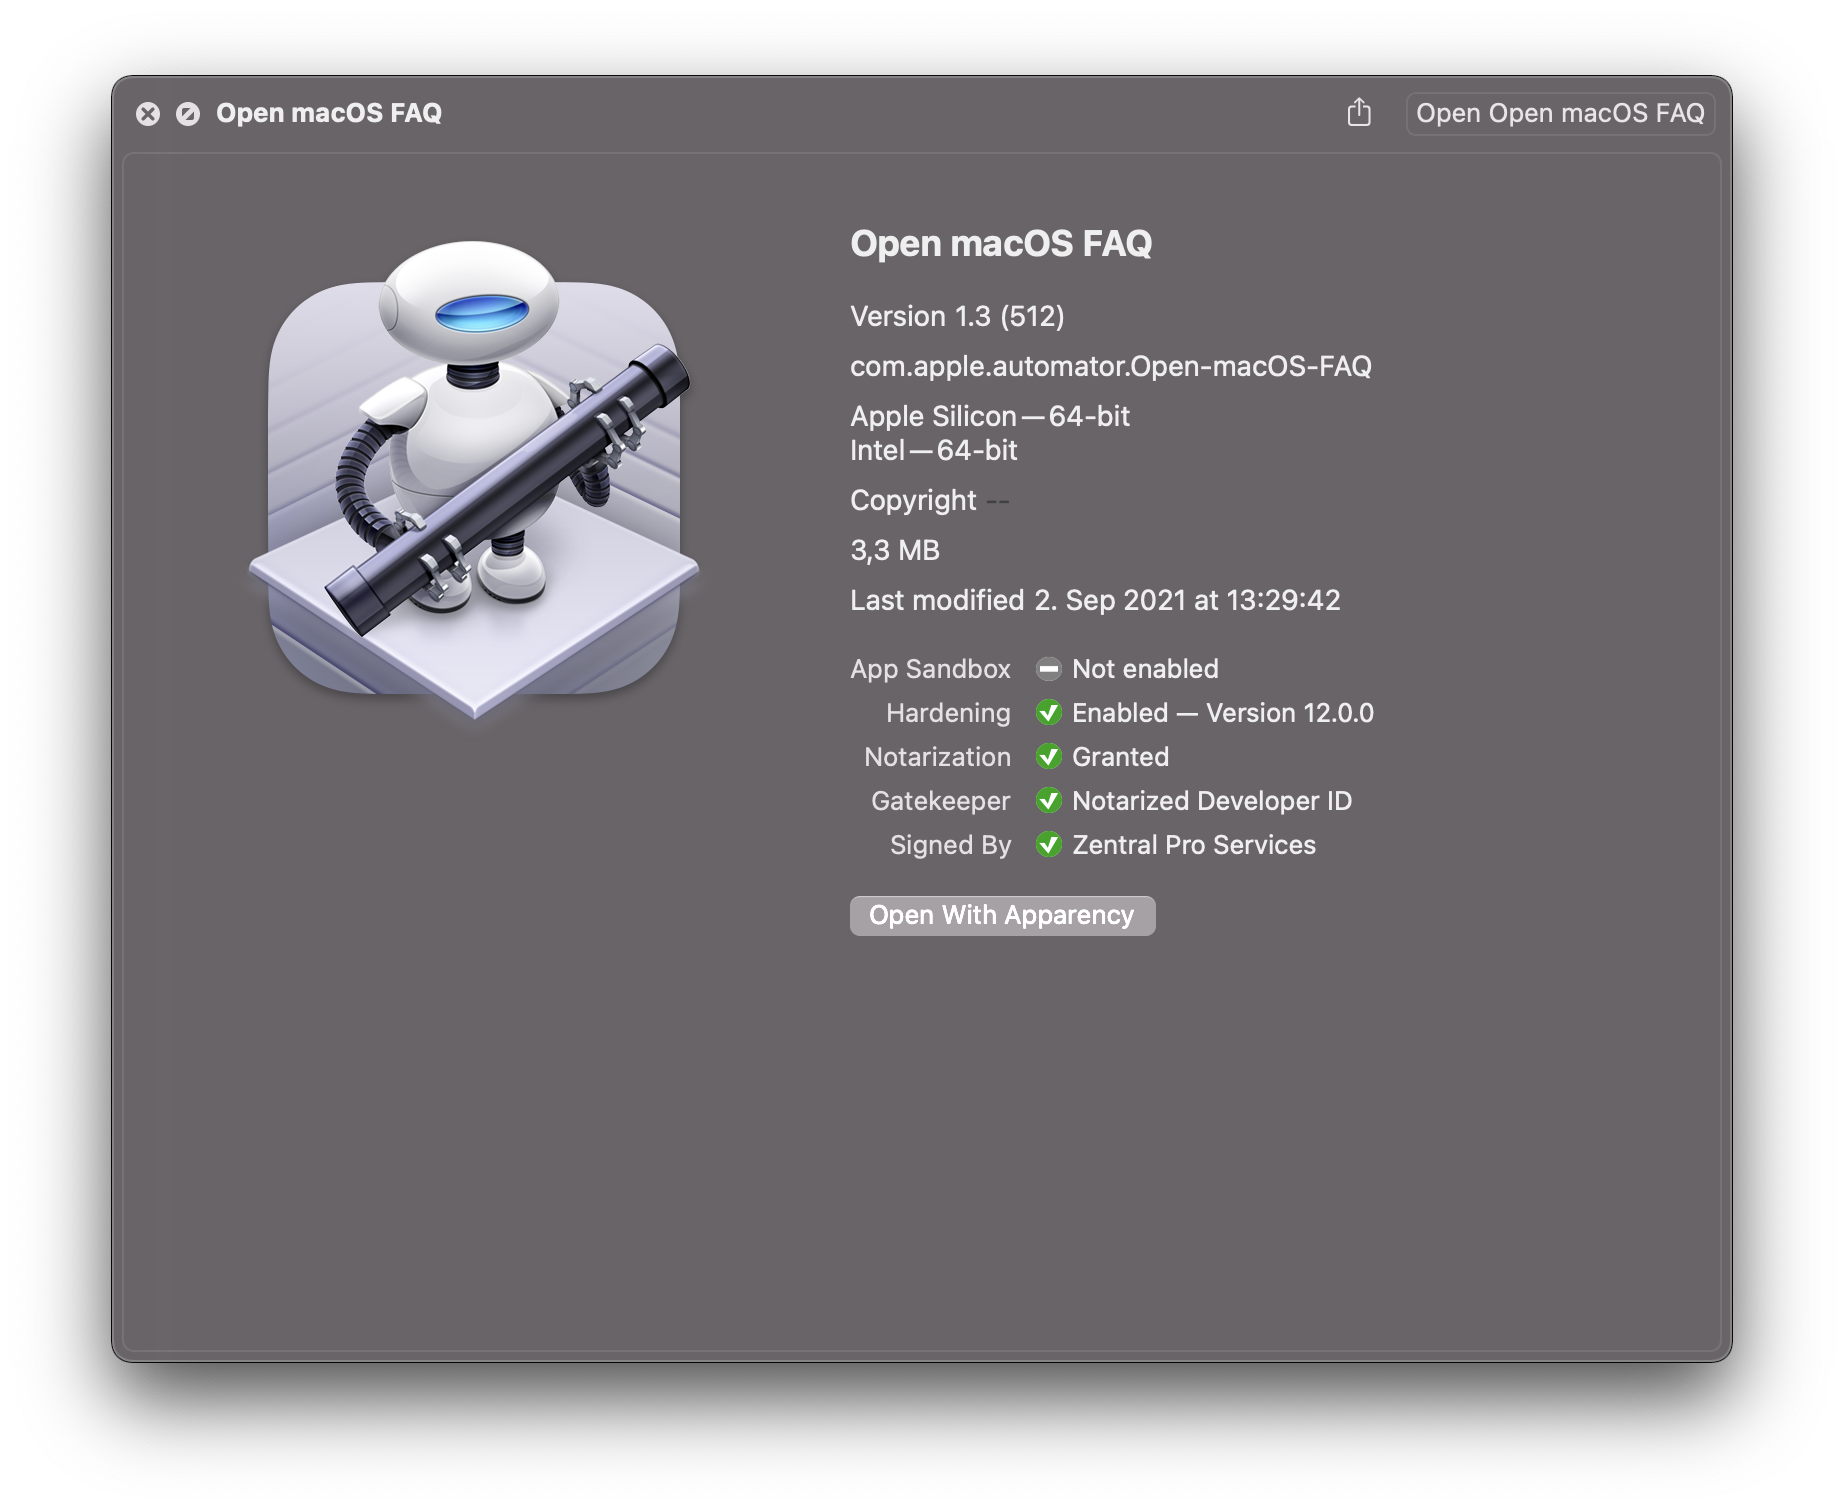
Have a look at app details and status on AppSandbox, Hardening, Notarization, Gatekeeper, and CodeSigning with this great utility app called Apparency.
example app, notarized:
Conclusion #
We have learned how to use the new Apple notarytool that is part of Xcode 13. The steps shown above represent a rather trivial example, but the underlying processes can also be used in more complex applications.
Additional resources: #
- Customizing the Notarization Workflow, by Apple
- Notarizing macOS Software Before Distribution, by Apple
- Can you tell whether code has been notarized?, by Howard Oakley
- Will changes to notarization make any difference?, by Howard Oakley
- Apparency.app, by Mothers Ruin Software